Photographing Humantay: Why the Lake Looks Fake (and How to Shoot It)
A Humantay guide explains the physics behind the unreal turquoise, the light windows that make or break the shot, and the compositions that actually work.
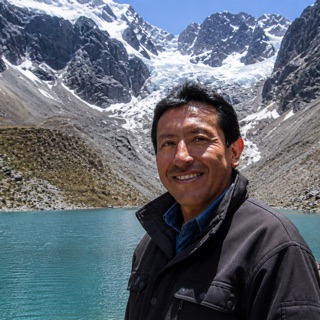 By Carlos Mamani, Humantay Lake tour guide & high-altitude specialist
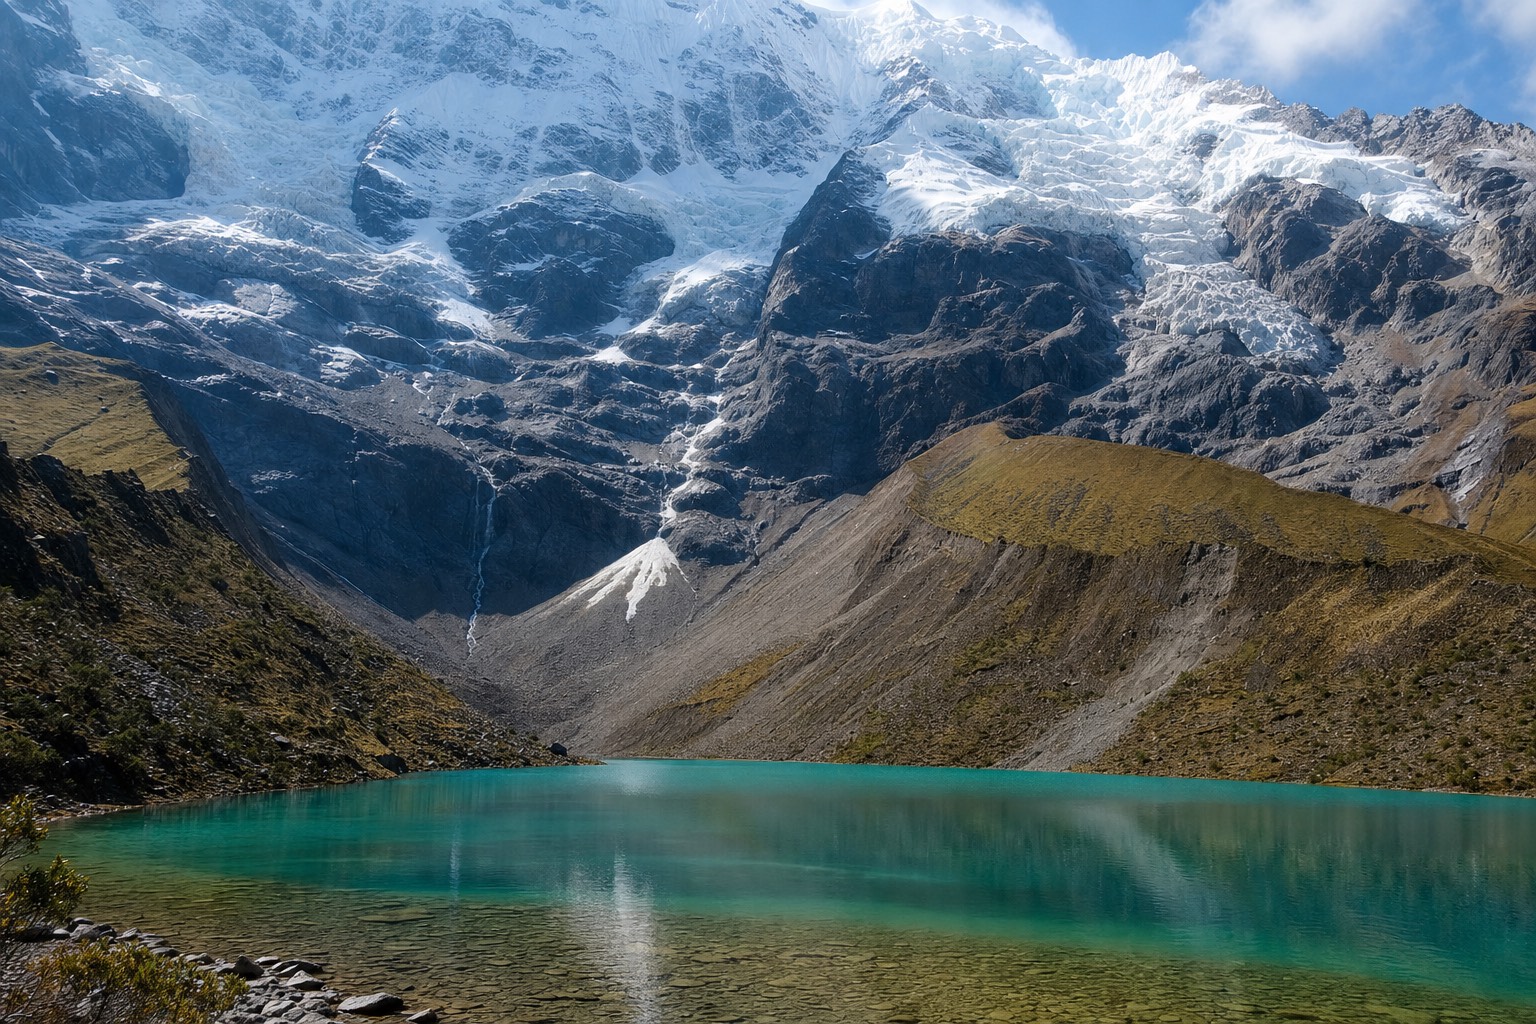
The comment I hear most often at the top of the moraine is not about the altitude. It is some version of "that cannot be real." People stand there catching their breath at 4,200 metres, look down at the water, and quietly accuse it of being photoshopped in advance. I have walked guests up this trail since 2022 and the reaction never changes. So let me do what I do at the shore, except in writing: explain why the colour exists, when it performs, and how to photograph it without embarrassing yourself or disrespecting a lake that local communities hold sacred.
Booking choice: See the lake and glacier on a guided photography stop. Check Humantay Lake dates
Affiliate recommendation · final price and options on GetYourGuide.Why the water looks fake: rock flour and light
The turquoise is physics, not filters. Glaciers on Humantay peak grind rock into a powder so fine it stays suspended in the meltwater. Those particles scatter sunlight, absorbing reds and bouncing back greens and blues, which is why the lake glows an opaque milky turquoise instead of the clear dark blue of a normal mountain lake.
Guides call the powder rock flour, and once you know it is there you start seeing the lake differently. The water is not transparent. It is loaded with mineral sediment carried down from the glacier that hangs off Humantay peak, and that suspended load is the whole show. More light means more scatter, which is why the colour switches on when the sun hits the surface and sulks when a thick cloud sits over the valley.
The colour also drifts across the year as the sediment load changes. After heavy melt or rain the water can trend greener or milkier. In the driest months it can sit closer to a deep mineral blue. I have watched the same lake wear four different colours in one season. None of them are wrong, and none of them need saturation pushed to 100 in your editing app. If anything, the honest advice is the opposite: pull saturation back a touch, because cameras already overreact to this much cyan.
What this means for your shot is simple. You are not photographing water, you are photographing light hitting sediment. Chase the light, not the water.
The light windows: what each hour actually gives you
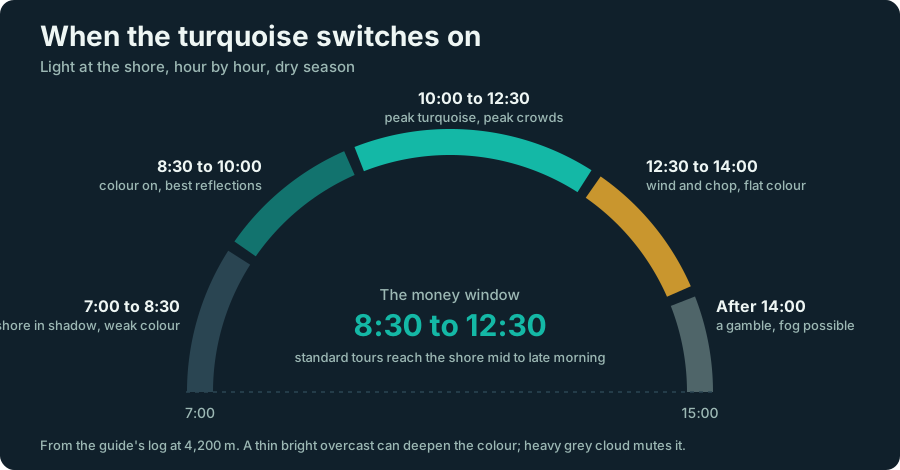
Late morning is the money window. Sun needs to clear the ridgelines and land on the surface before the turquoise fully switches on, and afternoon tends to bring wind, cloud, and texture on the water. Tours arrive mid to late morning, which by luck or design is close to the strongest colour of the day.
Here is how I would describe a typical dry-season day at the shore, from guiding this trail and standing around at the top far longer than any sane person should:
| Time at the lake | Light behaviour | What your photos look like |
|---|---|---|
| 7:00 to 8:30 | Sun still behind ridges, shore in shadow | Moody, grey-green water, great peaks, weak turquoise |
| 8:30 to 10:00 | Direct sun reaches the surface | Colour switches on, calm water, best reflections |
| 10:00 to 12:30 | Full sun, highest colour intensity | Peak turquoise, but peak visitors on the moraine too |
| 12:30 to 14:00 | Wind picks up, cloud builds on the peaks | Choppy surface, flat colour, dramatic sky if lucky |
| After 14:00 | Cloud and weather shifts common | A gamble; sometimes fog erases the lake entirely |
A thin, bright overcast is the secret nobody expects. It kills the harsh shadows and glare while leaving enough light for the scatter to work, so the colour pops without hot spots. Heavy grey cloud is a different story, and I wrote about that kind of day in the day the lake was grey. If your dates are flexible, the dry months stack the odds in your favour; the full breakdown is in my guide to the best time to visit.
One warning that belongs in a photography article: the sun at this altitude is violent. UV at 4,200 metres burns you through thin cloud while you fiddle with compositions. Sunscreen and sunglasses are camera equipment here, not comfort items.
Phone or camera: what actually survives the hike
A modern phone gets you 90 percent of the shot with none of the weight, and weight matters on a steep climb at altitude. A dedicated camera earns its place only if you bring a polarizer, shoot RAW, and want the glacier face compressed with a longer lens.
I see guests haul serious kit up the switchbacks and then take their favourite picture on a phone anyway. Be honest with yourself about which photographer you are before you load the daypack. My full packing logic lives in the packing guide, but the photography-specific trade-offs look like this:
| Phone | Camera | |
|---|---|---|
| Weight on a steep 300 m climb | Nothing | 1 to 3 kg you will feel above 4,000 m |
| Colour handling | Overcooks cyan, auto HDR flattens the glacier | RAW keeps the real tones for honest editing |
| Glare on the water | No filter option on most models | Circular polarizer cuts glare, deepens turquoise |
| Wide shore panorama | Excellent built-in modes | Needs a wide lens or stitching |
| Glacier face detail | Digital zoom turns to mush | 70 mm plus compresses ice beautifully |
| Cold and battery | Drains fast in wind, keep it warm | Spare battery in an inside pocket |
Two phone-specific tips. First, tap to expose on the water, not the sky, then drag exposure down slightly; blown highlights on the glacier are the most common ruined shot I see. Second, wipe the lens. Three hours of trail dust and sunscreen fingers put a haze on every phone lens at the shore, and half the "why is mine blurry" questions I get end right there.
For camera people, the polarizer is the single highest-value item. Rotate it until the surface glare drops and the sediment colour comes through. Just do not max it out, because a fully polarized sky at this altitude goes almost black and starts looking as fake as the water.
If you remember nothing else technical, remember the five shots people ruin most at this shore, and the single move that saves each one.
| The ruined shot | Why it happens | The fix |
|---|---|---|
| Blown-white glacier | The camera exposes for the dark water | Tap to expose on the water, then drag exposure down |
| Hazy, soft everything | Trail dust and sunscreen on the lens | Wipe the lens before you shoot |
| Cartoon-cyan water | Auto mode overcooks the turquoise | Pull saturation back a touch in editing |
| Near-black sky | A polarizer cranked to maximum at altitude | Rotate it only until the surface glare drops |
| Flat, colourless lake | The sun has not reached the surface yet | Wait for direct light; shoot foreground meanwhile |
Compositions that work at the shore
Three setups carry the day: the reveal shot from the moraine lip with the lake appearing below you, the glacier face doubled in a calm morning reflection, and a low foreground anchor such as shoreline rocks or the stacked stone cairns left as offerings. Shoot all three before experimenting.
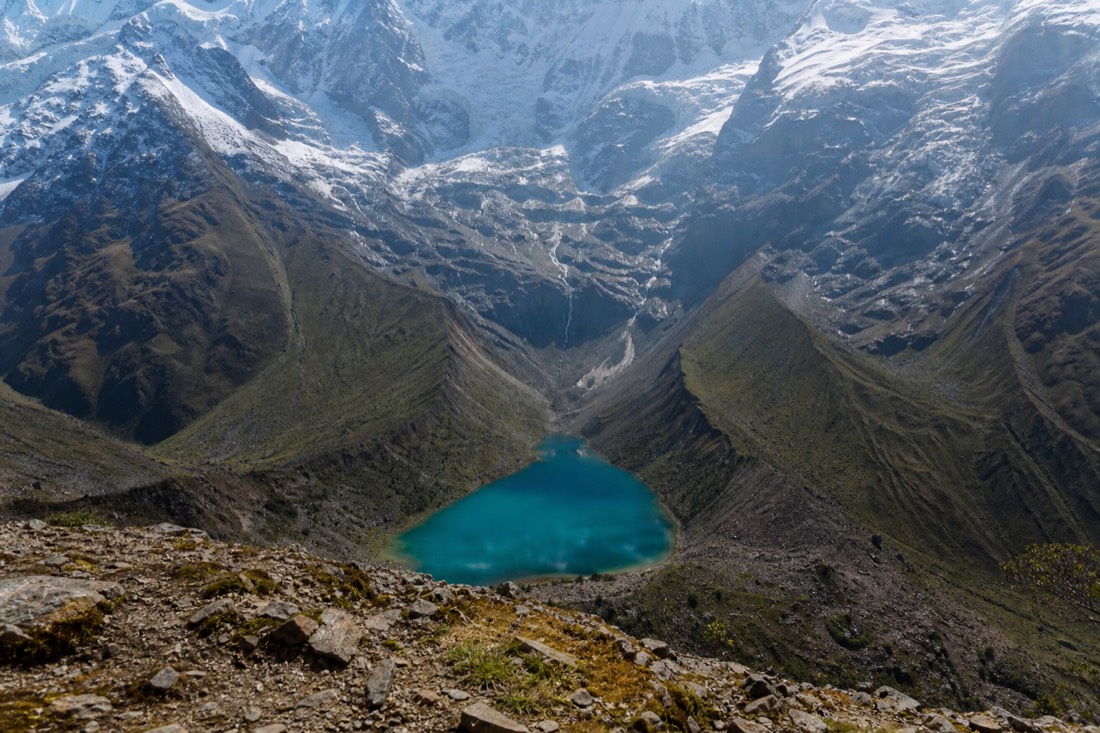
The moraine lip reveal is the classic for a reason. You crest the final rocky rise, the ground drops away, and the whole turquoise bowl opens beneath the glacier. Shoot it slightly wide from the top of the rise, keep a person in the frame for scale, and take it immediately on arrival before you walk down, because you will not want to climb back up for it. Trust me on that.
At the waterline, resist the urge to centre everything. Put the shore in the lower third and let Humantay's ice wall take the top of the frame. On calm mornings the reflection doubles the glacier and you can go symmetrical, which is the one time centring works. The neighbouring giant, Salkantay, stays hidden from the lake itself, so do not waste time hunting for it in your viewfinder.
| Composition | Where to stand | Best light | Common mistake |
|---|---|---|---|
| Moraine lip reveal | Top of the final rise, on the trail | Any direct sun | Walking past it, planning to "get it later" |
| Glacier reflection | Marked shoreline path, water's edge | Calm 8:30 to 10:30 | Horizon tilted, glare not controlled |
| Cairns in foreground | Beside the apacheta stones, respectful distance | Side light | Touching or restacking the stones for a "better" frame |
| Human for scale | Friend on the trail 20 m ahead | Mid morning | Posing them dead centre in bright clothing chaos |
Those stone cairns deserve a sentence of their own. They are apachetas, offerings with real meaning to local communities, not photo props. Photograph them where they stand. Do not move stones, add stones, or knock one over reaching for an angle.
Shooting respectfully at a sacred lake
Humantay is a sacred place and a protected water source, so the rules are firm: stay on the marked trail, never enter or touch the water, and leave the offerings alone. Every strong composition at this lake is available from the trail and the shore path. None require breaking those rules.
Every season I watch someone edge past the shoreline path toward the water for a marginally lower angle. The shot they get is not better. It is the same lake with wet boots, taken at the cost of disrespecting communities for whom this water is alive and sacred, on ground that thousands of feet already stress. Swimming and entering the water are prohibited, full stop, and the fragile moraine edges off-trail are genuinely unstable in places.
The good news for photographers is that the trail is the viewpoint. The route up was worn in along the sightlines, the shore path gives you the reflection, and the moraine lip gives you the drama. Working within the boundaries costs you nothing except the illusion that you needed to break them.
Getting yourself there in the right window
You cannot schedule the light independently on a group tour, so pick a departure that reaches the lake in the late-morning colour window with enough shore time to work. The early pickup exists precisely so the group hikes in morning calm and stands at the water while the turquoise peaks.
This is where the brutal 3:30 AM alarm earns its keep, and I say that as someone who has written about that alarm with love and resentment in equal parts. Leaving Cusco before dawn means breakfast in Mollepata, boots on the trail early, and arrival at the shore inside the light window instead of after the wind arrives.
Small groups matter to photographers more than most people realize: fewer of your own group in the frame, and a guide with time to point you at the angles.
When the colour does not show up
Some days the lake is grey, and no technique fixes weather. If cloud sits low, shoot mood instead of colour: fog on the glacier, hikers in rain shells, the scale of the bowl. A grey Humantay photographs honestly, and honest beats fake turquoise pushed in an editing app.
I will not pretend every visit ends with the postcard. In the rainy months especially, cloud can park itself over the bowl and mute everything, which is why photographers with flexible dates lean toward May through September. If you draw the grey day anyway, work with it. Long shots of mist tearing off the ice, tight frames of the trail switchbacks, steam off a thermos at the shore. Those pictures age better than you expect.
And whatever the sky does, take one photo of nothing in particular for yourself, then put the camera away for five minutes. The lake at 4,200 metres, with your heart still thumping from the climb, is better in person than any file you will carry down. That is not a guide being sentimental. That is the one review every guest agrees on.
Your next step
Choose your day from Cusco
Match the trip to your plans
General recommendation · confirm your own requirements
Humantay Lake with breakfast and buffet lunch
Have a date in mind? Let one booking cover the ride to Soraypampa, your guide and both meals. Check your departure before arranging the rest of your trip.
12–13.5 hours · Transport, English/Spanish guide, breakfast and buffet lunch, first aid and emergency oxygen. Entrance fee and optional horse are extra, paid locally in cash.
Choose the historic-center pickup option and confirm your hotel; other options use a meeting point. Downtown Cusco drop-off.
A steep high-altitude hike. Not suitable for pregnancy, mobility or respiratory limitations, vertigo or low fitness. A horse does not remove the walking or altitude requirements. Free cancellation until 24 hours before departure.
Affiliate links: we may earn a commission if you book, at no extra cost to you.